
100 Ways to Keep Your Kids Busy While Stuck at Home
- Mickey Farmer
- Mar 17, 2020
- 32 min read
Updated: Sep 25, 2020

Whether you’re homeschooling, it’s summer break, or your children are quarantined at home because of a pandemic, sometimes you need help finding ways to keep your kids busy! We’ve compiled a list of fun art projects, DIY games, cooking fun, science projects, learning other cultures, and other activities that will excite and often educate them.

ART
1. Pencil Pals
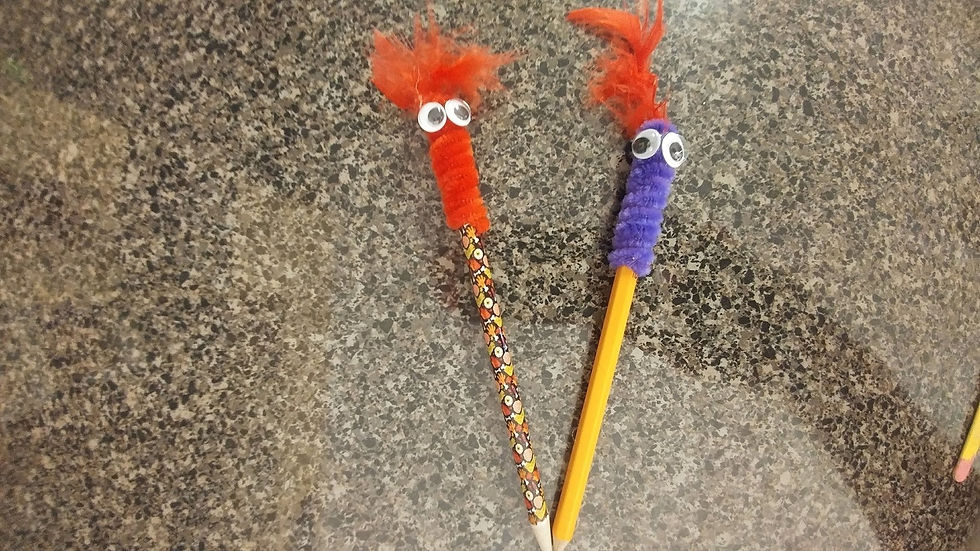
A little creativity goes a long way, and adding pencil pals to a pencil adds a touch of fun to the old # 2s. All you have to do is wrap a pipe cleaner tightly around the eraser end of the pencil and add googly eyes at the top. You can also add a feather on the top to give your pencil pal an extra touch.
2. Toilet Paper Roll Creatures
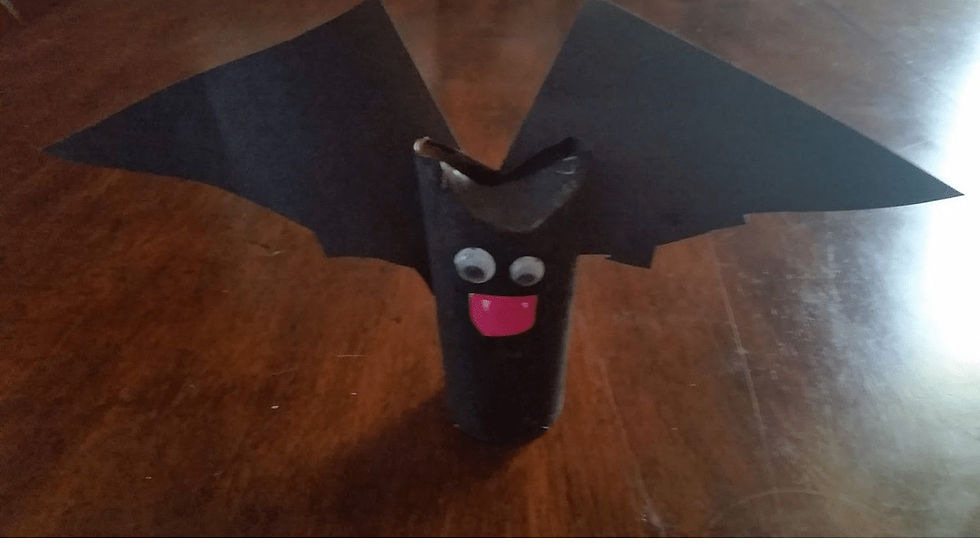
Paint a toilet paper roll black, then bend in the top on either side to create “ears” on the left and right. Add googly eyes, and then draw and cut out a mouth and glue it onto the face as well. The final step in your TP roll bat would be to cut wings out of black construction paper and glue those to the back of the roll, creating your finished masterpiece!
3. Paper Plate Characters
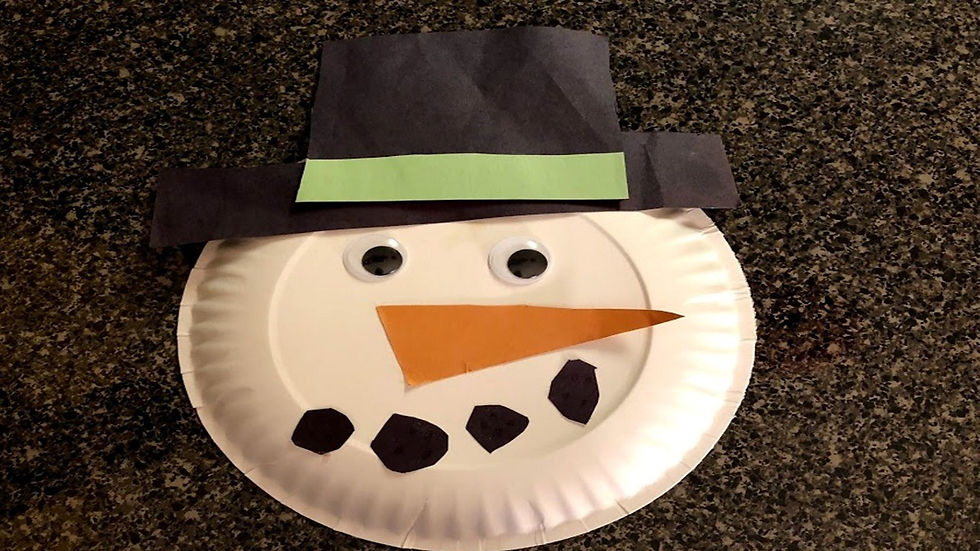
For our character, we chose a simple snowman, but you can make anything you can imagine! For the snowman, though, use the back of a white paper plate as your snowman’s face. You’re already almost done! Add buttons for the mouth and eyes. Googly eyes always do well for eyes instead of buttons if you’d like. As an alternative to the buttons for the mouth, you can use black construction paper to look like rocks or coal. Add a “carrot” nose and a black hat from construction paper. Construction paper could make suitable eyes too and also a way to add some color by making the eyes blue. With that your snowman is done and all smiles!
4. Paper Bag Animals

For our fun little bag animal, we chose to make an owl! Add a face to a paper bag. Glue leaves to each side of the back of the bag so that the leafy part hangs out to the left and right as the owl’s wings. Then, bend pipe cleaners as the owl’s ears and feet and glue those on as well.
5. Fingerprint Art

Fingerprint art is very easy to make, and you can create any sort of picture you’d like. We chose to make an Easter bunny scene. Have your kids make a thumb print in pink, then use their other fingers to make three yellow prints. A black marker to add eyes, beaks, wings, and stick legs to the yellow finger prints, turning them into chicks. Then add eyes, curved legs, bunny nose, whiskers, and a cottontail to your pink thumbprint to make a bunny. Then you have a neat Easter piece of art that your little ones helped make. Since fingerprints are involved, this doubles as a keepsake that you’ll likely horde forever with the ton of other things the kids have made!
6. Melted Crayon Art

First, fasten crayons to your picture where you want the melted crayon wax to be added to your art. Whether you put them on someone in your drawing’s head so they can become hair or in the branches of your drawing’s tree to become leaves, melted crayon wax can really brighten up a picture and make them really unique and pretty.
7. Fireworks Painting
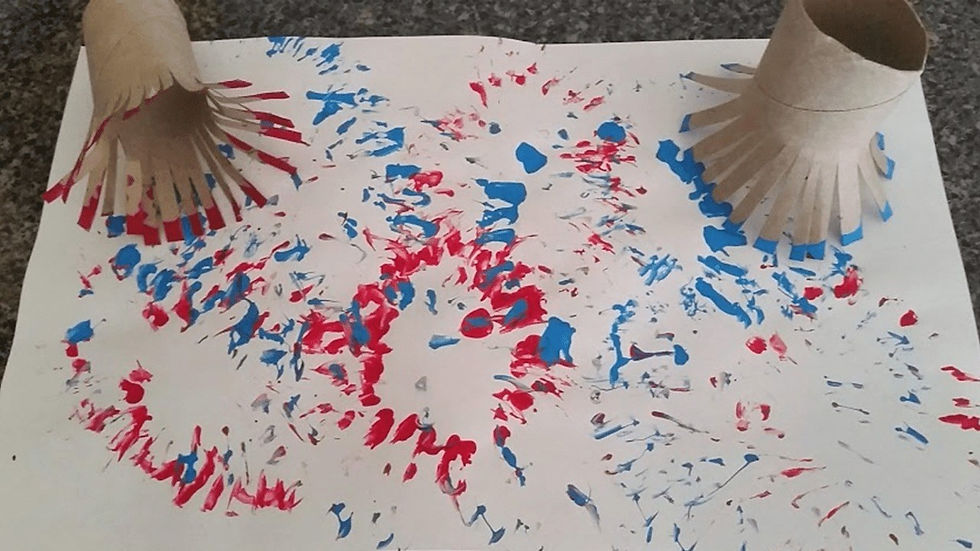
Cut the end of a toilet paper roll into strips and fan the strips out. Dip the stripped end into paint. Now, stamp the paint-dipped end of the toilet paper roll onto a piece of paper to get a firework explosion effect. Stamp over and over with multiple colors to make your painting look like a big fireworks finale!
8. Hand Art
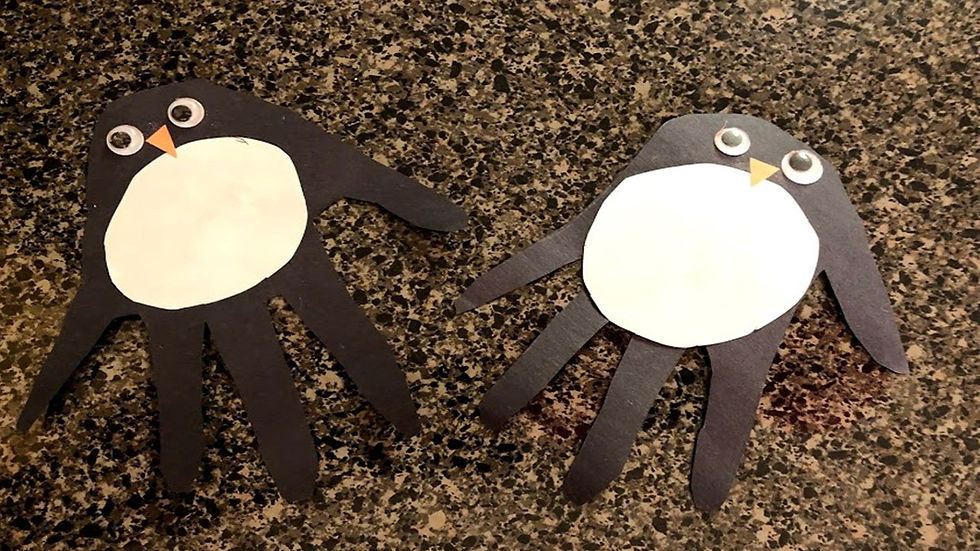
It’s nice to always include a craft that doubles as a keepsake with which you can look on for years to come and say, “aww, look how small their hands were!” Hand crafts can be fun all year, not just as the turkey at Thanksgiving.
For the penguin, trace your kids’ hands on black construction paper and cut them out. Add a white circle to the center of the hand. Then above the circle, at the edge of the palm, add an orange construction paper beak and 2 googly eyes. Sure, your penguin has 3 legs…but no one is going to notice that because the end result is just too adorable.
Another example would be a Hand Flamingo.
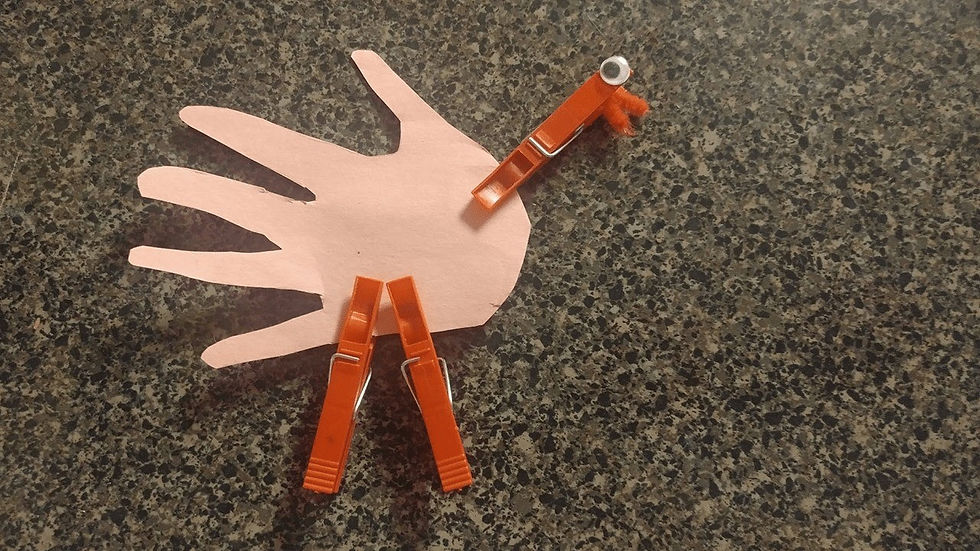
Trace your kid’s hand on a pink piece of paper and then cut the tracing out. Add pink clothespins (or in lieu of pink, use red ones like we had to) to create the legs and neck. a pipe cleaner, or piece of construction paper makes a great beak, and then add a googly eye to finish it.
Another example, because you can’t get enough artwork with your little ones’ hand prints, the Beach Crab!
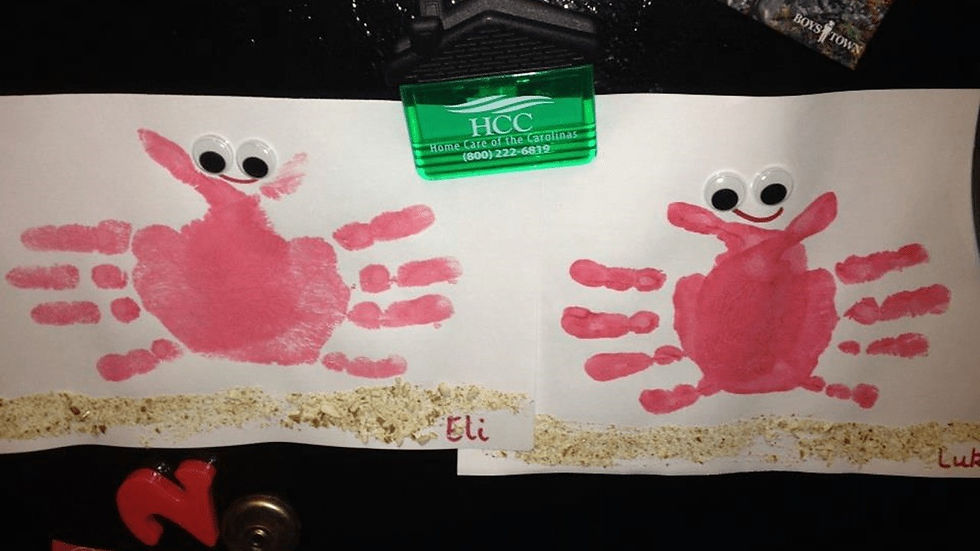
Paint the kids’ hands red. Have them stamp a piece of paper with two hand prints, in opposite directions with palms overlapping. Add googly eyes for eyeballs. A thick line of glue across the bottom with sand or crushed cheerios sprinkled on it makes the crab look like he’s walking on the beach!
9. Paper Plate Sun
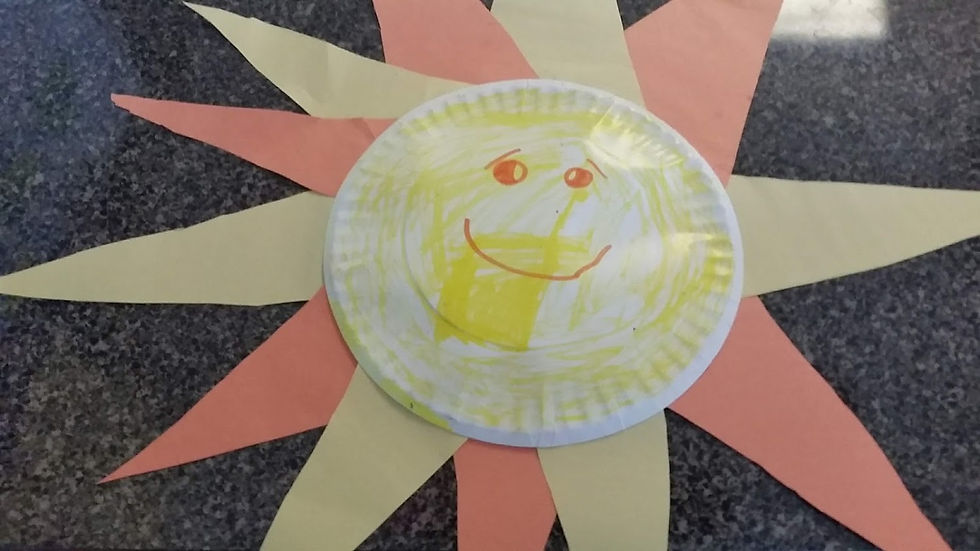
Color a paper plate yellow, add eyes and a smile. Then, cut orange and yellow construction paper into triangles to add around your plate as the sun’s rays. Want to spice it up? Have the kids create different mouths and change the sun’s expression. Happy sun? Surprised sun? Sad sun? Kid’s choice!You could make the entire solar system and teach about the planets while you’re at it.
10. Potato Stamp Art

Cut a potato (or apple if you can’t get your hands on a spud) in half. Carve a design into the face of one of the halves. For this image, we chose a flower for a spring theme. Paint the image with the right coloring for your picture, then use your potato half as a stamper onto a piece of paper.
11. Multi-Colored Crayons

Save up your bits of broken crayons. When you get a good amount, grab your muffin pan and spread your broken crayon bits into different cupcake wrappers. Really mix the colors up!Throw your batch into the oven until the crayons have melted well. Let them cool and solidify, and you have multi-colored crayons! Granted…they’re round…but awesome.
12. Painter’s Tape Art

Here’s an easy and fun art project. Grab some painters tape and use it to spell out a word, we chose “DAD”. Then, paint over it. Make it colorful. Make it messy! When it dries, carefully remove the tape, and you’ll have a blank space left where your word was, which will make it really pop in juxtaposition with the colorful painting around it.
13. Pompom Art
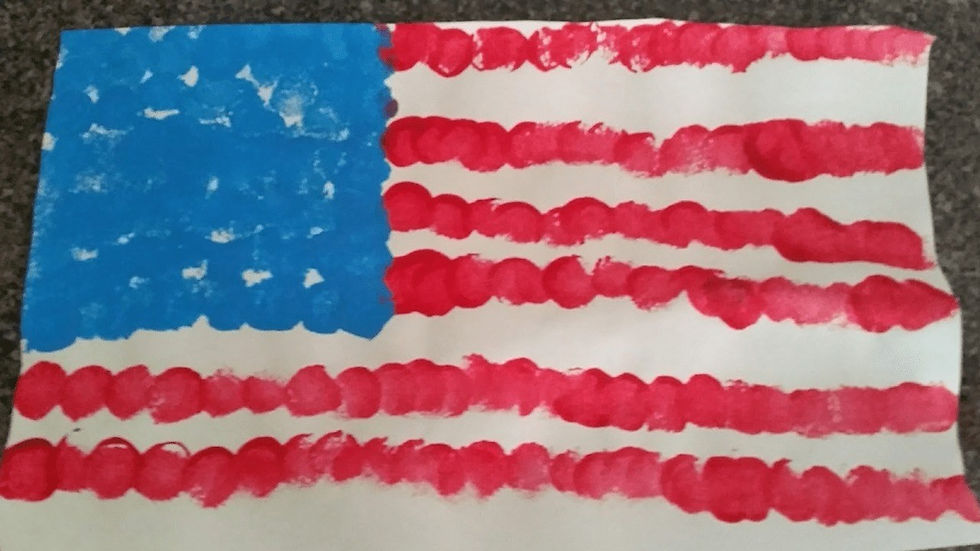
We made a flag using pompoms. For ours, cut out a rectangular piece of white paper. Use a pompom dipped in red paint to dab out your red stripes for the flag. Dip a 2nd pompom in blue, using it to make the blue square section. As you’re dabbing out the blue section, be sure to leave spots of white open to serve as your stars.
14. Water Gun Painting
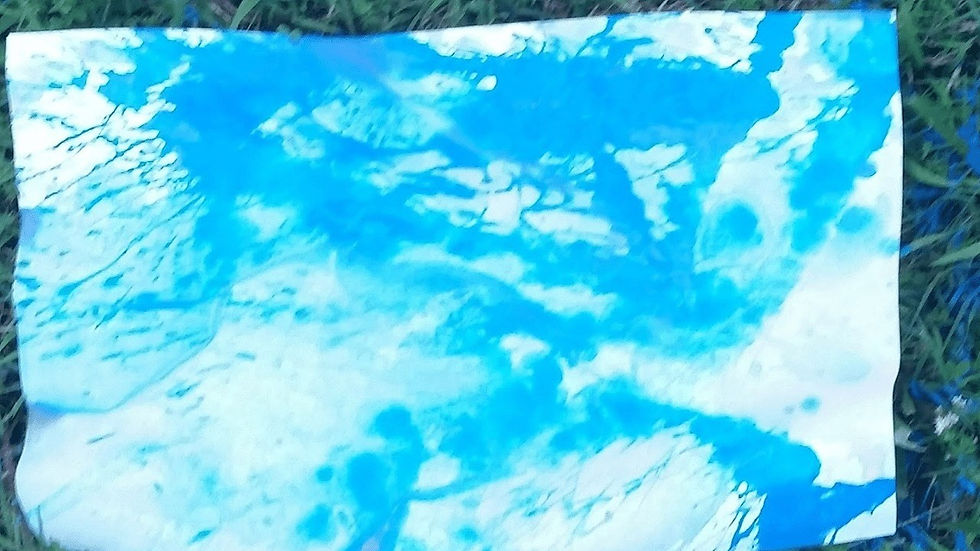
Equal parts washable tempura paint and water is mixed before being loaded into your water gun. Now hand it to your kids and let them start spraying colors a their paper. Multiple guns/colors create quite a painting! Great outside activity as long as everyone is wearing paint-safe clothing.
15. Get Creative with Leftover Boxes

We used boxes to create a robot, but really you can create whatever you can imagine, from robots to castles!
16. Comparing Footprints Craft

Probably the most sentimental craft in this list, paint the bottom of a parent’s shoe and stamp a piece of paper. (wipe the paint off afterwards!) Next, paint (with a different color) a kid foot and, once dad’s shoe print is dry, stamp the kid foot in the center of dad’s print. Write “Following in Dad’s Footsteps” to really get those tears out of dad!
17. Photo Bookmark
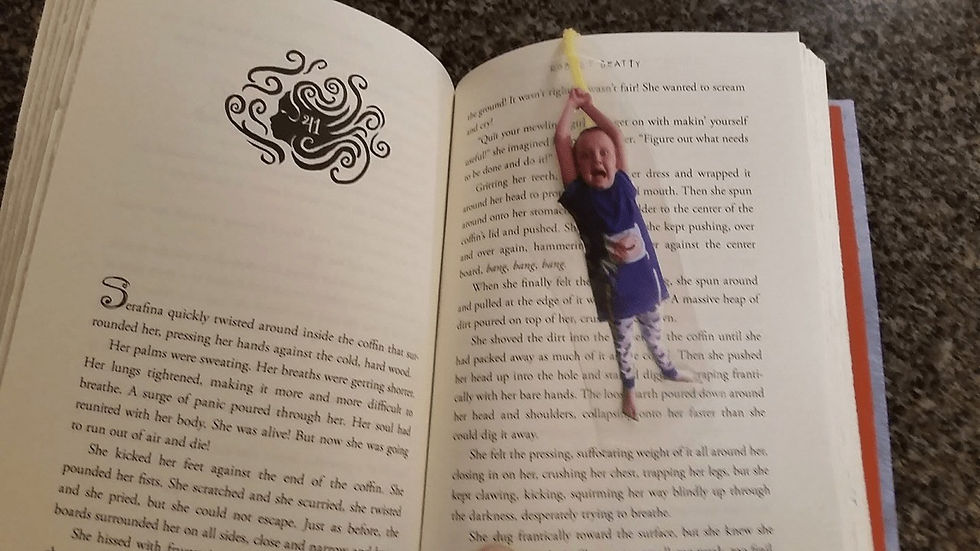
This is a craft, sure. But it also doubles as a small gift for any reader in your family. IF either of the parents is a reader? Then, it’s perfect for Mother’s Day or Father’s Day. This craft idea was gotten from here.
First, you take pictures of your children looking like they’re hanging from the edge of a cliff or dangling from a rope. I got a front and a back image that sort of matched so that on one side of the bookmarked page, you’d see the kid’s face. On the back of the page, you’d see his back. Print your pictures off. I printed mine as 3.5 X 5 in.
Use a hobby knife (or other cutting utensil of your choice) to cut your child out precisely. Laminate the pictures. You can use self-laminating sheets which can be gotten at any office supply store or big box store. Cut those out. If you’re doing “cliff hanging” pictures, just put the 2 pics together with clear tape at the top. If you’re doing “rope dangling” pictures, connect the two pics together with a short piece of yarn and tape the yarn ends to each pic so that it looks like the kids are holding the ropes.
18. Craft Bookmark

Corner bookmarks are cute and very useful. With them “biting” the page you last read, the bookmarks make it very easy to get back to your last page.
19. An Apple for Teacher
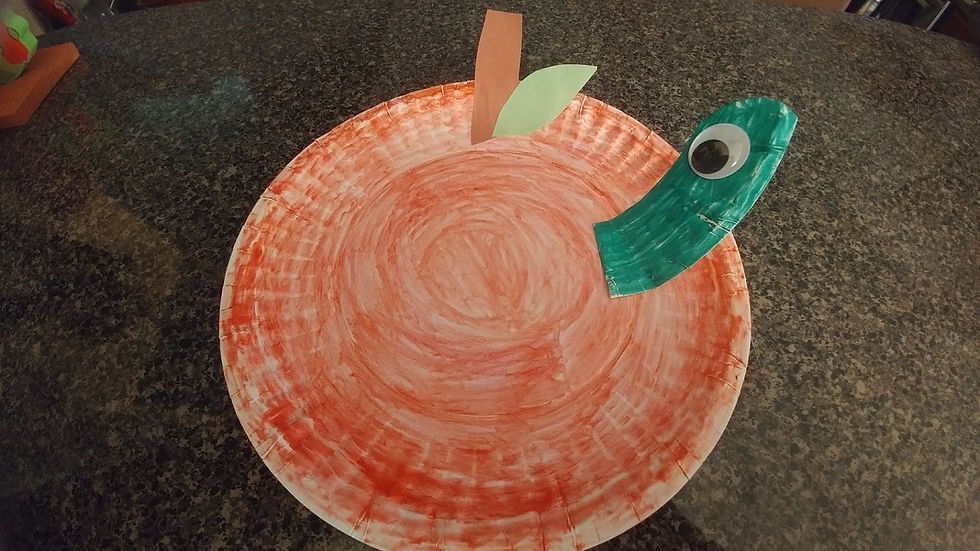
Paint a paper plate red and add a stem and a leaf using construction paper. Then, cut a piece of another paper plate from the curved edge and color the piece green. Add a googly eye to your green piece, and you have a worm! Glue the worm to your paper plate apple as your final touch.
20. Popsicle Pencils

This is an easy craft. All you have to do is get a few Popsicles, paint them yellow except for about an inch on each end. One end, paint pink as the eraser. On the other end, use a Sharpie to draw in the lead end of the pencil.
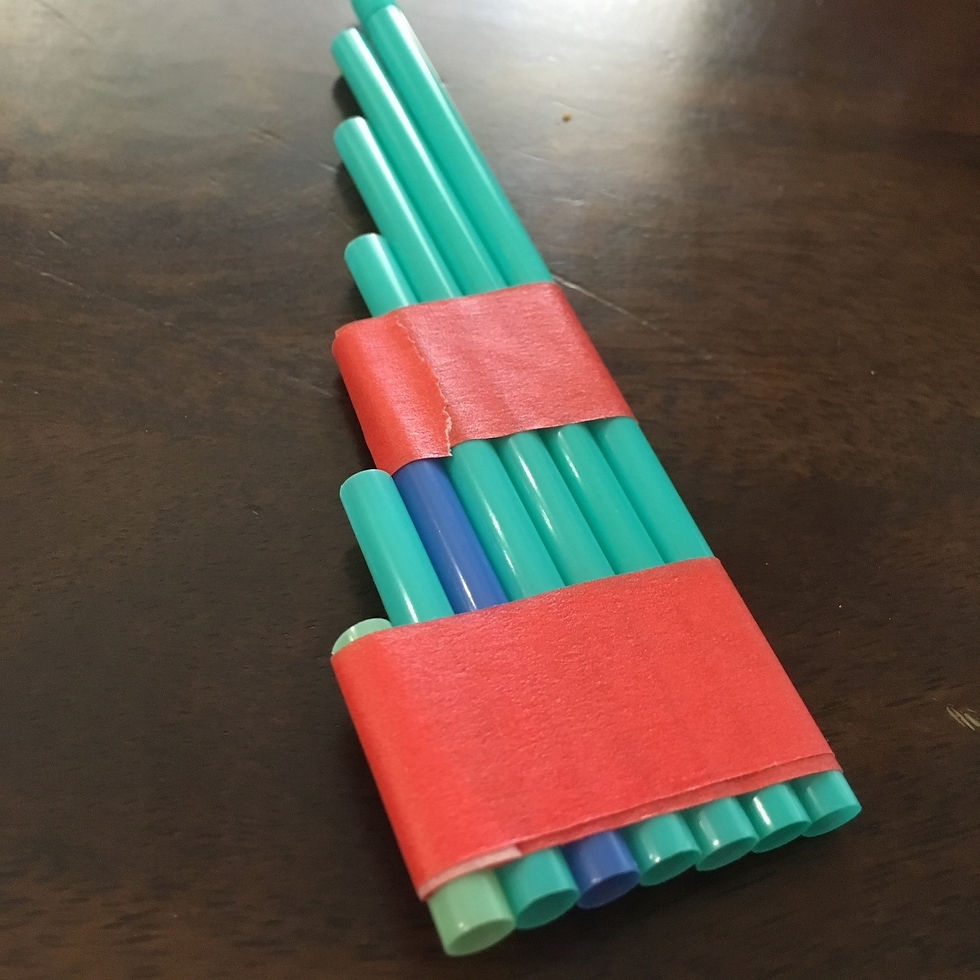
21. Sparkler Craft
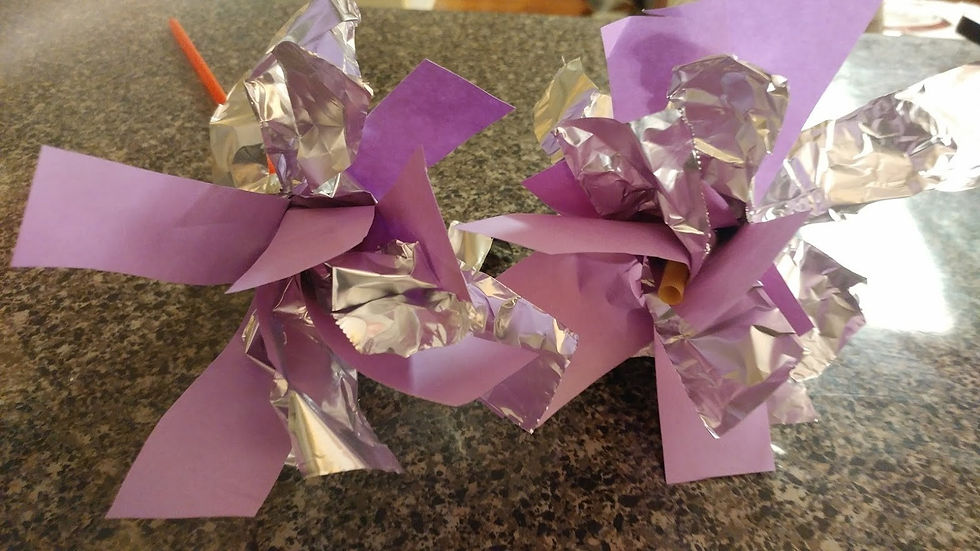
Roll a piece of aluminum foil and brightly colored paper or colored plastic wrap around a colorful drinking straw. Then, carefully cut the top edge into thin strips, trying to keep them the same width. You’re left with a suitable alternative to a sparkler for the kids that don’t like the flames of the real deal.
22. Soda Bottle Flowers

This is a fun, yet simple craft that can result in a pretty picture. If you want, you can follow our path of making Thailand or Japanese cherry trees, but this would work for any flowering tree.
Draw your tree, then dip the bottom of a 2 liter or 20 ounce soda bottle into the paint color of your choice, and use the bottom of the bottle as a stamp to add flowers on your branches. Add background and scenery to form a complete picture.
23. Sand Art

Sand Art is a fun, creative, and colorful way to make something unique.
24. Button Tree
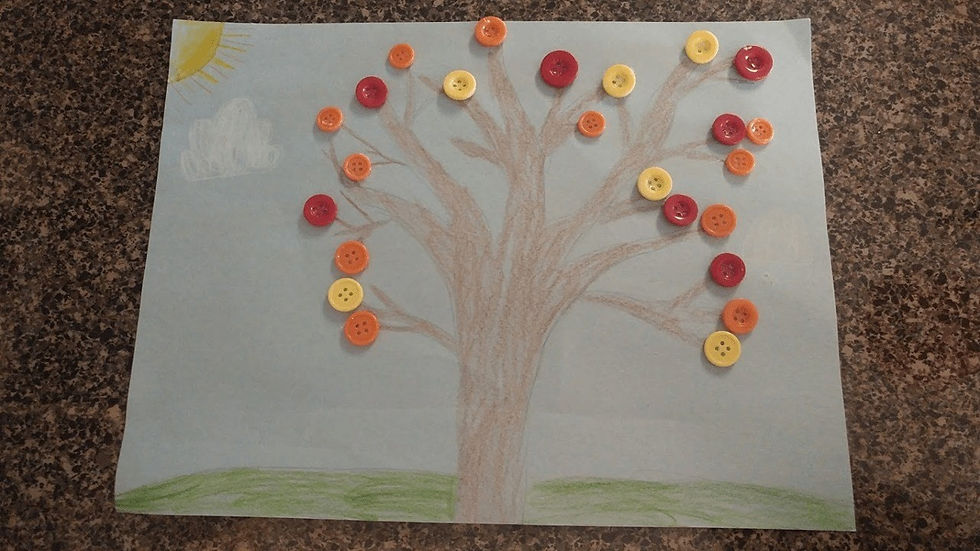
Draw a tree and let the kids color it in and place the fall-colored buttons around the tree as its leaves. The best way to glue them down is a hot glue gun, so help the kids with this step, or simply do it for the smaller kids.
25. Heart Flower
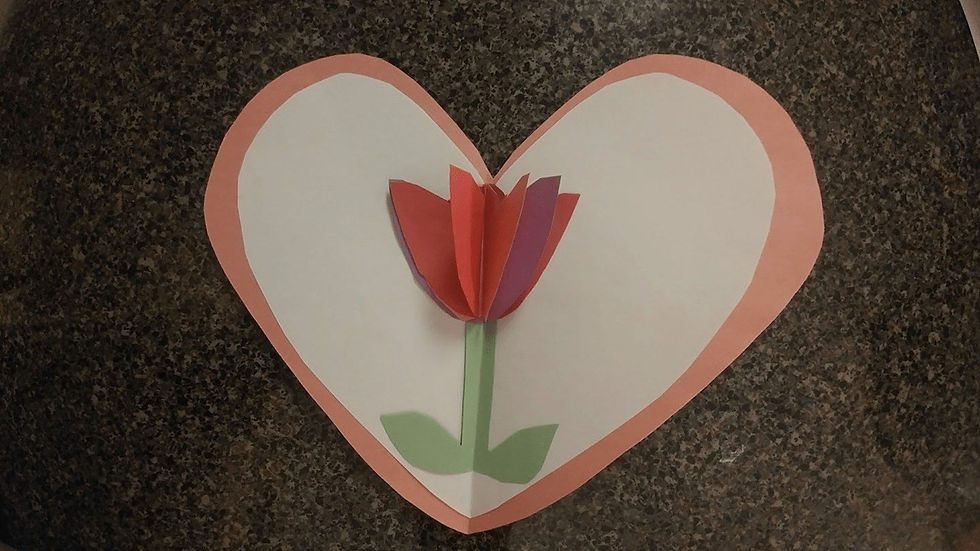
This craft creates a cool 3D effect. When you open the heart, the petals of the flower fan out. To make it, cut a pink or red heart out of construction paper, then cut a 2nd heart slightly smaller than the first in a different color paper. Glue the 2nd heart to the first and fold the 2 in half. Next, add the “stem” of the flower in the crease along with leaves for the stem. Finally, cut out a flat, 2-dimensional flower in multiple colors. Glue them in place, center on the crease of the hearts at the top of the stem, one on top of the other. Fold the WHOLE thing in half again. When you open the card, you should see the separate, differently colored petals stand up.
26. 3D Photo
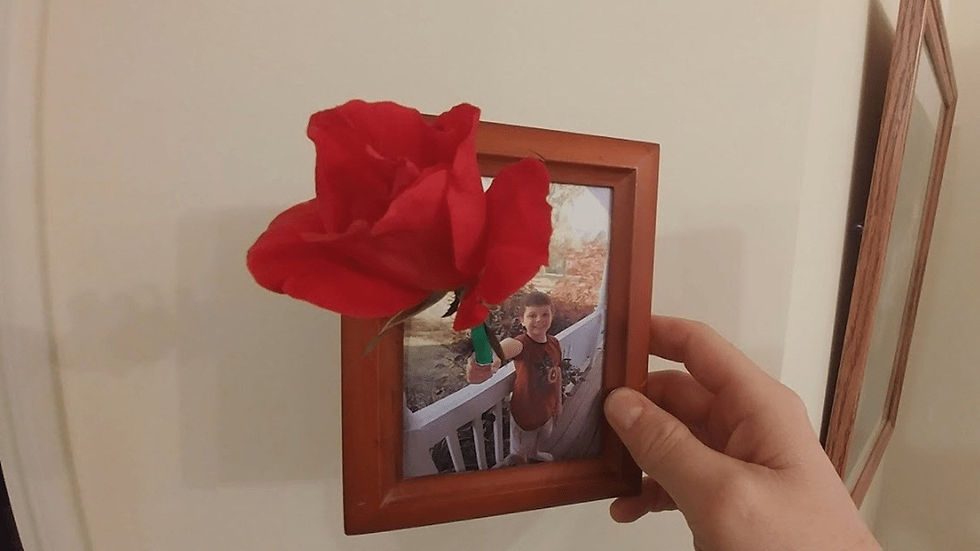
Take a picture of your kid with their arm outstretch with a fist. Print the picture and put a small hole in the fist, big enough for a straw to stick through. When I first saw crafts like this on the Internet, they all had paper flowers attached to the top of the straw to create their 3D flower. But, I decided to forego the paper flower and cut a real one to insert in the straw end. This way, the straw acts as a 1-flower vase and can be changed out from time to time. The 3D effect works well either way you choose, fake or real flower.
27. Paper Towel Roll Painting
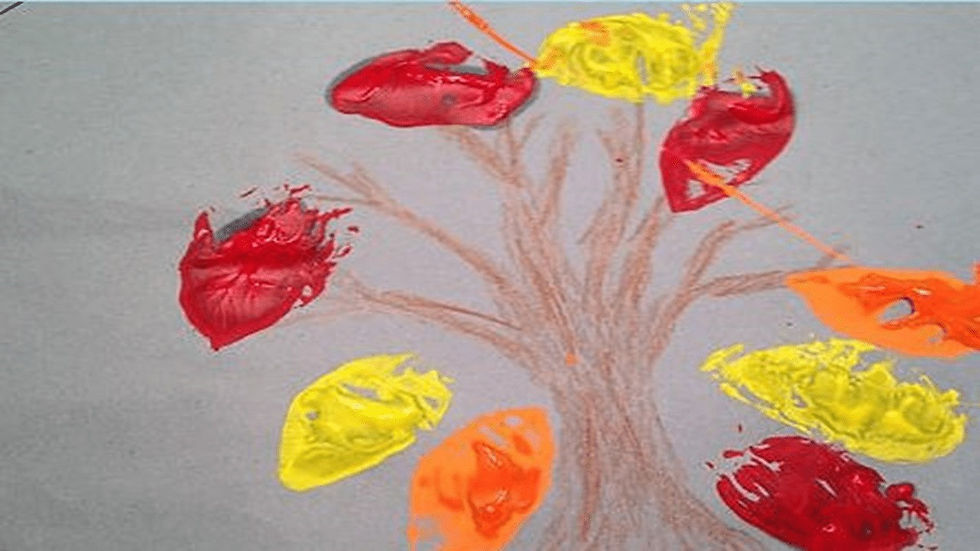
The leaves in this colorful tree were made by bending a toilet paper roll into an oval, dipping that oval into paint and using it to stamp the page with a leaf mark. Use multiple roles and different colors to make it beautiful and bright tree.
28. Finger Painting

Finger painting is great fun, usually leaning to the younger kids who don’t quite have the best control with crayons or paint brushes. However, it can be fun for any age.
29. Newspaper Pom Poms
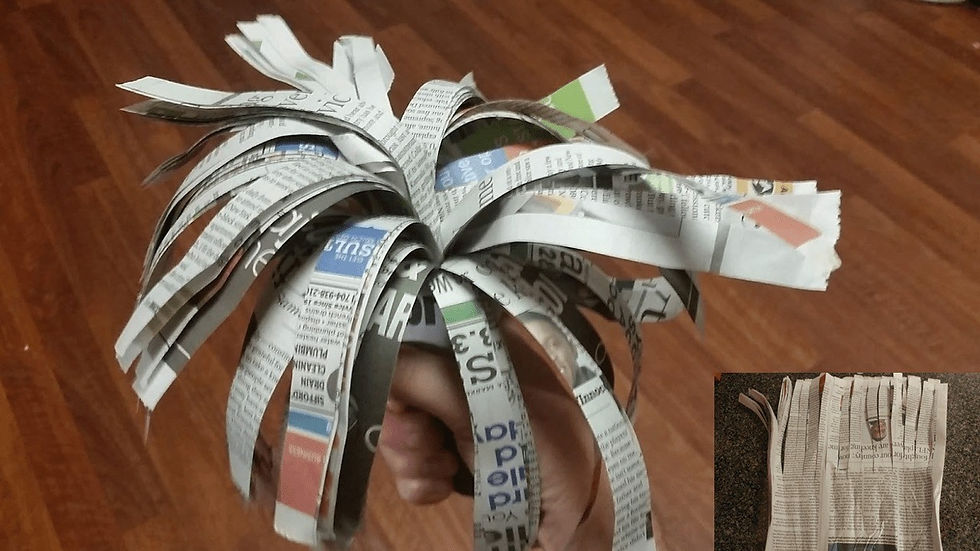
Using a few pages of a newspaper, cut the paper in about 1 inch wide sections all the way across the paper. For length of the cut, you’ll want to leave a couple of inches near the fold of the paper uncut. Roll the paper up. The uncut portion becomes your pom-pom holder.
30. An “I Love You This Much” Card
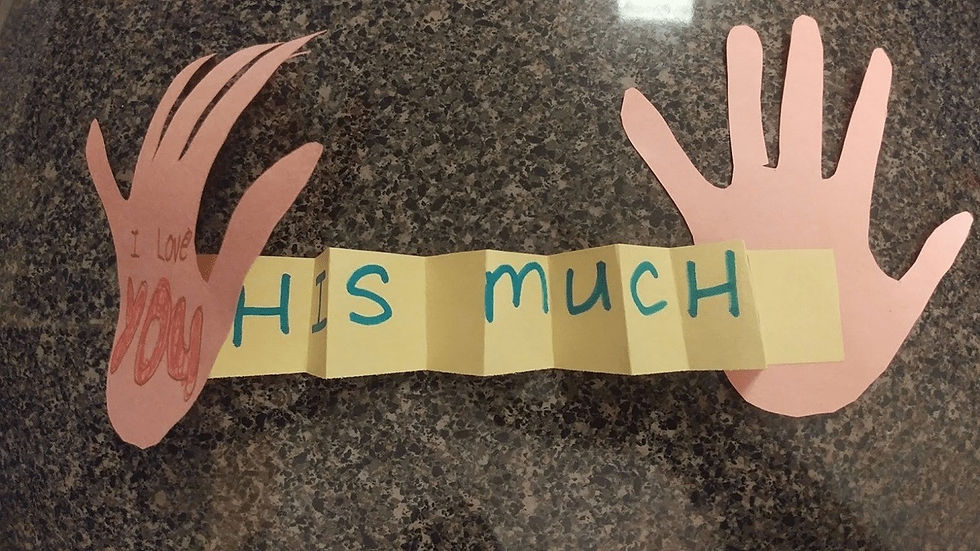
Kids love to say “I love you THISSSSS much” as they stretch their arms out wide, with the distance between their hands showing just how much. And, of course, we love it when they do that too. Well, that’s exactly what this card does! Fold a piece of construction paper, trace a kid hand and cut out the tracing in the folded paper, creating two construction paper hands. Next, cut out a strip of construction paper in a different color. Write out, in big letters, “THIS MUCH”. Fold the strip at each letter, alternating the fold to create and accordion style fold. Attach each end to one of the hands. On the front hand, write “I Love You.” So, when mom or dad sees their card, it says “I love you.” When opened, the two hands stretch out wide, and the card says “THIS MUCH!”
31. Pine Cone Pineapple
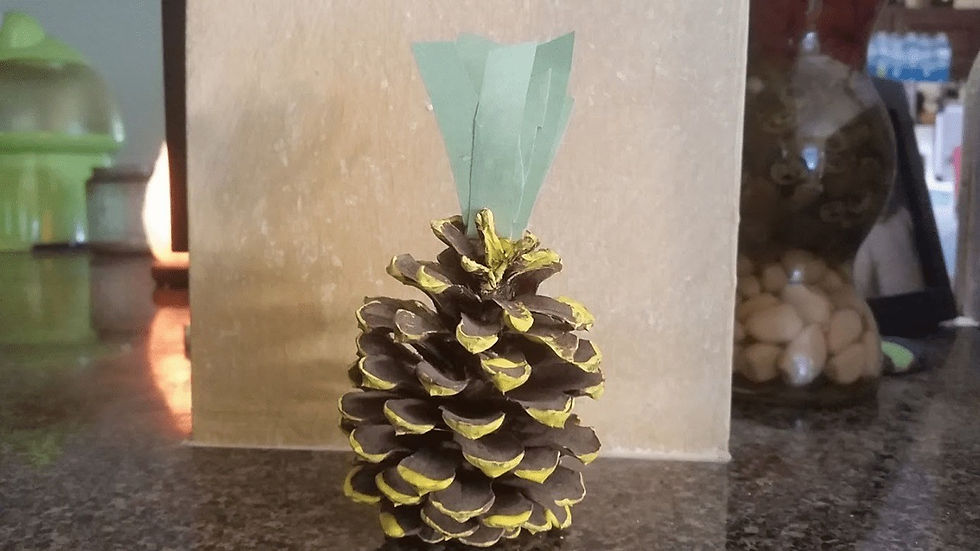
Just in case it hasn’t already been hard enough for your kid to keep the words “pinecone” and “pineapple” straight…throw this summertime craft their way. This cool craft makes a pinecone look like a pineapple by painting the edges of the pinecone yellow and putting some “greenery” on top.
32. Jellyfish
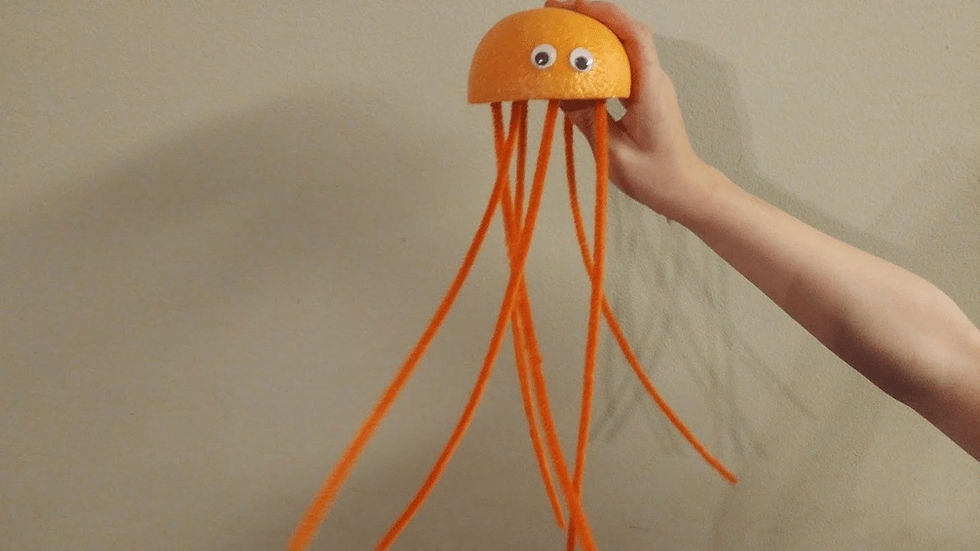
Cut an orange in half and add eyes to your half. Feel free to use a tangerine, or a grapefruit, or a lemon, or a tangelo, or etc, etc. The eyes can be drawn on or glued on. Then, use pipe cleaners as the tentacles by sticking them into the flat side of the fruit. Wave it around like it’s swimming!
33. You’ve Got Mail!
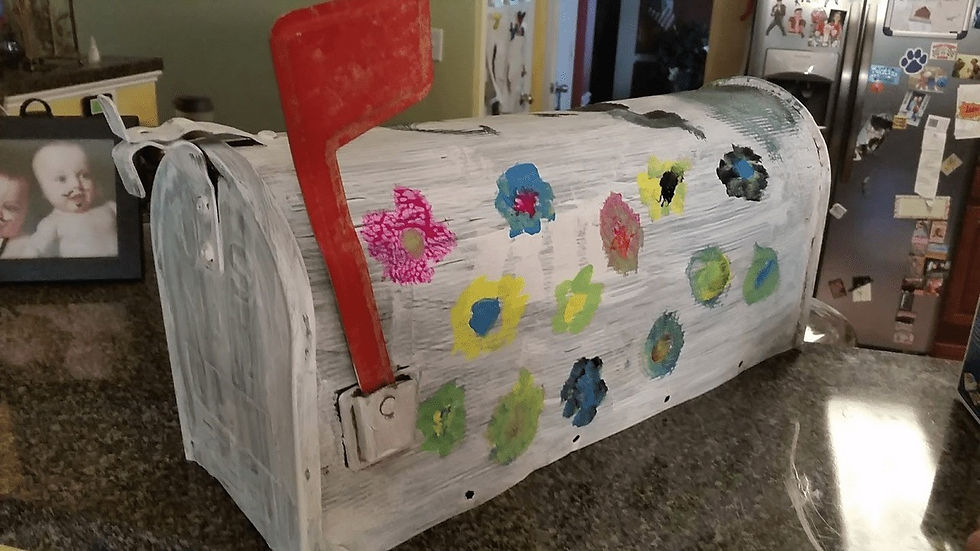
This makes for a cool craft and an ongoing family activity. First, you need an old mailbox…or fashion one out of cardboard or other type of material. Decorate the mailbox however you choose. My boys painted their mailbox white and added birds and flowers to it.
Then, you and your kids can send letters back and forth to each other from that point on. Each time someone puts something in the mailbox, put up the flag so others know to check for new mail!
34. Footprint Characters

Paint your children’s foot and press it onto a piece of paper. Then, add accessories to complete your character. The only thing you have to decide is what character you want to create? We chose Star Wars. For that, the color you use will depend on the character you’re making. Black for Darth, light brown for Chewie, and so on. Once the foot print dries, add in decoration to turn the foot into a Star Wars character. It makes for a cute keepsake. And, if the spouse isn’t into Star Wars as much as you? They’ll still love this because it’s Jedi level awesome.
35. Paper Plate Puppets

Once again, we went with a Star Wars theme here, but you can create any character you want! Whoever you choose, this craft is very easy to make, so even the little ones can join in. Plus, since it’s a puppet, they can play with it afterwards instead of only being able to see it stuck to the refrigerator. For our Yoda, the hardest part is finding a green plate. (St. Patty’s Leftovers?) Draw a face onto the plate. This can be as detailed or non-detailed as you’d like. If the tykes are doing the drawing, the old circles for eyes is plenty good enough. After all, the face is green – that’s 90% right there. Get some green construction paper, draw, and cut out the ears. Then glue a Popsicle stick to the bottom. Done!
36. Color Resist Art

We chose Star Wars again! Can you guess we love those movies? When we first made this craft, it intimidated me a little because I wasn’t sure how it worked (so wasn’t sure how it would turn out). Turns out, it is super easy and super fun. Start with a paper cupcake baking cup or a coffee filter, depending on the size you want your picture (OR Death Star) to be.
Next, with a white or grey crayon, draw a design for your picture (or Death Star). You can add as many details as you want, though until you add the black paint, your details are kind of hard to see even for you to keep up with what you’ve done. If like us, you’re doing a Death Star, one detail you want to be sure to add is the encircled Death Star laser cannon. Once you’re ready, use a paint brush to apply black water color to your project. The paint won’t cover up your crayon design, it’ll only fill in the empty space between and around your crayon coloring. Whatever picture you chose to do will shine through the black paint.
37. Crayon Earth

What’s a good lesson to teach for Earth Day? Recycling! Grab your old broken blue and green crayons and recycle them into something new. Put the broken blue and green crayon bits into a section of a muffin pan and bake them for a few minutes until fully melted. Remove them from the oven. Once the melted parts cool off and solidify, flip the muffin pan, and dump out of your new “Earth Crayon”.
Make sure you are watching small hands carefully, as hot pans and hot wax would not feel nice on little fingers. We don’t want our children to grow up hating the earth because of 1st and 2nd degree burns.
38. Rainbow Craft

April showers bring May flowers, but they also bring RAINBOWS! It only makes sense that in our list of Spring crafts we include a rainbow. Cut a strip of each color of your rainbow and help teach that ROY G. BIV concept to your kids by having them put the colors in order. Next, have them glue one end to a sheet of construction paper. Then, glue the other end, but create an arch with your paper strips to really add to the rainbow effect. One end of the rainbow gets a sun, the other gets cotton balls to create the look of the rainbow ending in a cloud.
39. Caterpillar Craft

What kid hasn’t read The Very Hungry Caterpillar by Eric Carle or had it read to them? That green bodied, red headed caterpillar is iconic. It’s also the basis of our caterpillar craft. Link green construction paper loops into a chain. Add a red loop at one end of your chain. Then, add a face and antennae to the red loop to finish your caterpillar homage to our leaf eating friend.
Add the craft to a reading of the book, and you create a whole themed activity.
40. Flower Craft

Once again, you’ll need a toilet paper roll. Be sure to save these things! I once told my boys we needed one but didn’t have an empty roll. A few minutes later we magically had an empty roll…and a bathroom floor full of toilet paper! However you get your roll, once you have it, paint it green to serve as your flower stem. Cut out some green leaves for the greenery at the base of your flower stem and paste them to one end of your roll. Then cut out some flowers from brightly colored construction paper. Make a slit across the top of your “stem” and fit your flower into the slit. Make a few and you’ll have a whole flower garden!
41. Flyswatter Painting

There are a lot of fun and interesting ways to paint. One such way that kids really get a kick out of is to put paint on a fly swatter and let the kid go to town hitting the paper, making wild patterns.
42. Popsicle Architecture

Really, you can try your hand at any famous building or landmark you think you could feasibly make. For us, we made the Eiffel Tower. To do that famous French landmark, cut 3 squares of Styrofoam, each smaller than the last. Use Popsicle sticks to make the legs of the Eiffel Tower, connecting each square of the Styrofoam. Then, use 2 more Popsicle sticks for the top of the tower on the top of the 3rd square.
You’ll need to glue everything in place as you go.
For added detail, and to make your craft look a bit more like the real thing, glue toothpicks in crisscross patterns between your Popsicle sticks to look like the lattice work up and down the real thing.
DIY Games
43. Paper Football and Popsicle Goal
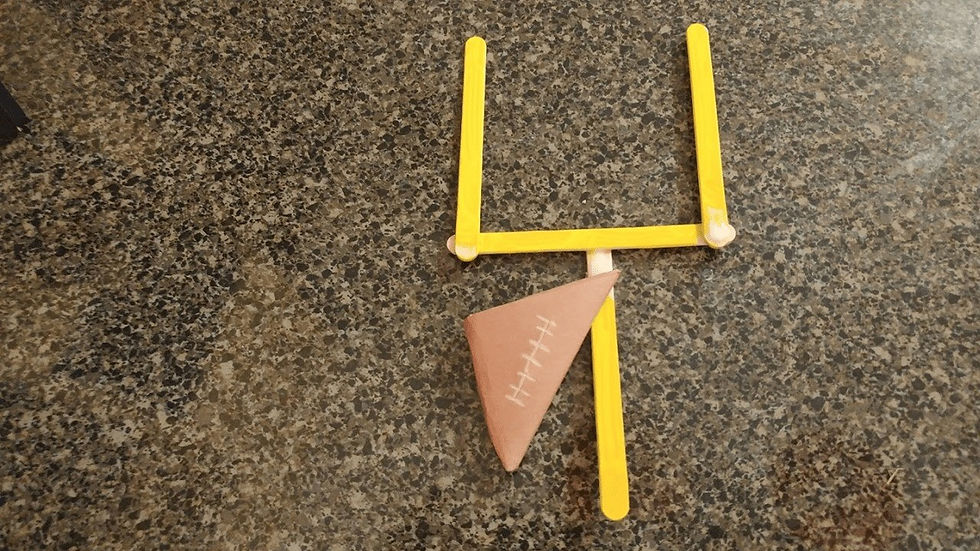
Fold a paper football, just like you used to back in school. For effect, use brown construction paper and mark white laces on it. Then glue Popsicle sticks together in the shape of a goal, paint that yellow. It’s a cool craft, but even better, it doubles as a fun game!
44. Spongeball
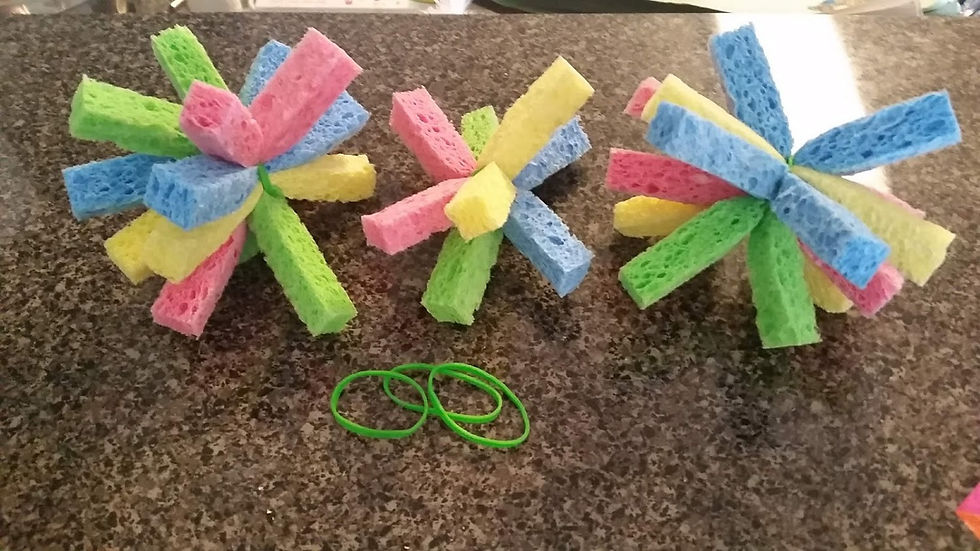
Cut some sponges into one-inch wide strips. Combine about 8 of the strips (in different colors to add pizzazz), and secure them together using a rubber band in the centers. Now dunk your sponge bomb in water and throw at one of your unsuspecting children. Better than a water balloon and reusable.
45. Balloon Pop

Tie balloons onto all participants legs. The game is…each person tries to pop everyone else’s balloon. Last one that has an unpopped balloon is the winner!
46. Chopstick Pickup

Lay out about 50 pom poms on the floor. Give each participant chopsticks. Have a paper towel roll for each participant sitting on the floor. The object of the game is to use the chopsticks to get all the pom poms put into the rolls. Once all pom poms are picked up. Count what’s in the rolls. The winner is whoever has the most.
MUSIC
47. Washer Castanets
We used washers, but you can use bottle caps, buttons, coins, or anything else that will make noise. Hold a piece of cardboard over and tape your hard objects to the inside flaps so they make noise when you snap them together.
48. Egg / Spoon Maracas
2 plastic spoons, a plastic Easter egg, some tape, and some beans is all it takes to make some cool maracas. We actually used beads inside of ours, but you can totally play around with different fillings to produce different sounds.
49. TP Kazoo
This was by far the easiest of the musical instruments we made…and also the loudest, thus most popular. Simply secure a piece of wax paper at the end of a toilet paper or paper towel tube, and have your kids talk into the end.
50. Toolbox Xylophone
Ok…Maybe there wasn’t much to this other than laying the tools out on some hand towels and letting them bang away. The trick was to use different sized wrenches in order to get different sounds, and then try and play a popular tune with them.
51. Singing Straws
Now, the success of this is going to depend on how old your budding musicians are, and if they can grasp the concept of blowing over something, rather than in. You basically cut straws at different lengths, tape them together, and blow!
52. Noise Makers
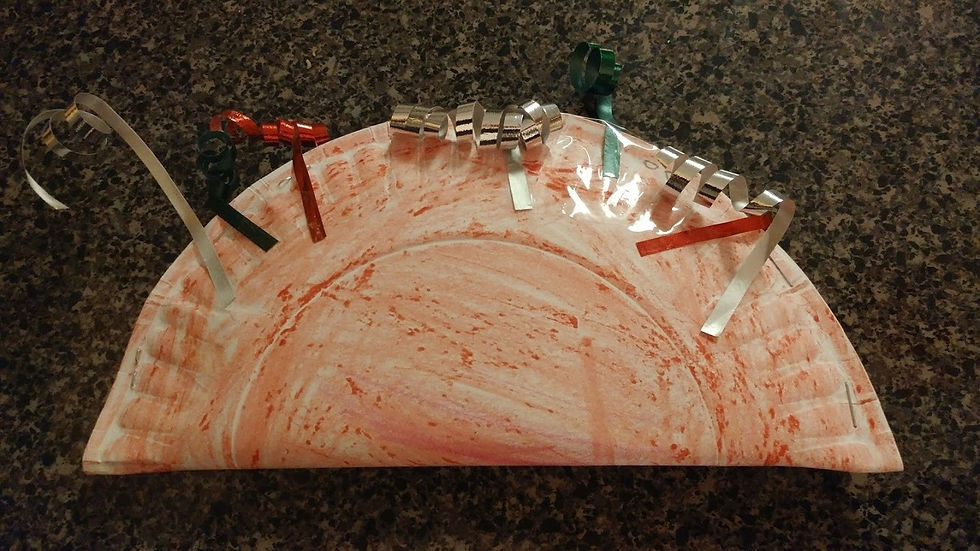
Color a paper plate however you’d like. Fold the plate in half and fill it with something that can make a good rattly noise. Dry pasta or beads work really well for this and are really inexpensive. Seal your folded plate with glue or staples. Finally, add colorful ribbons or anything else you can think of as decoration.
53. Rubberband Box Guitar

Create a rubberband guitar by cutting a hole in the top of a shoebox to amplify the sound, fitting a paper towel roll into one end of the box to act as the guitar neck. String rubberbands across the top as your guitar strings. Then, rock out!
54. Bottle Maraca

Bottle maracas are very easy to make. All you have to do is get an old water bottle and fill it, partially, with uncooked rice. Then, seal off the cap end (maybe adding some tape to ensure the cap doesn’t come off).
Boom, you have a musical instrument that your kids of any age can have fun with. All they have to do is shake it!
55. Paper Plate Tambourine

Decorate a paper plate with color and patterns, however you wish.
Then, use a hole puncher to make clean holes around the outside edge of the plate.
Use pipe cleaners to loop through the holes and through a bell, and tie that off in the back of the tambourine.
Continue adding bells this way all around the outside of the plate.
When done, you have a brightly colored, LOUD tambourine that your kids will enjoy play with for hours.
SCIENCE
56. Color Explosion (Milk + Soap Experiment)

Ingredients: a. Whole Milk b. Food Coloring c. Dish Soap
What happens when you dip a q-tip covered in dish detergent into regular milk? The fat in the milk literally moves away from the soap. Add food coloring to make the effect more visible and cool.
57. Lemon Volcano

Ingredients: a. Dish soap b. Baking Soda c. Lemon
This experiment creates a chemical reaction between the baking soda and the lemon juice. Cut the top 3rd off the lemon. Use a spoon to smash the insides of the remaining 2/3 of the lemon, keeping all the juice inside the skin. Really get it juicy. Pour some dish soap into the lemon. Add some food coloring to make the chemical reaction prettier and more fun. Finally, pour some baking soda into the lemon and stir your mixture up a bit. As the baking soda interacts with the lemon juice, the “eruption” begins.
58. Volcano or Exploding Lunchbag

Ingredients: a. Vinegar b. Baking Soda c. Red food coloring if doing the volcano version
When you add baking soda to vinegar, you get a great reaction. It fizzes, foams, and grows. If you use this in a homemade volcano, and add some red food coloring to the mixture, you get instant “lava”. The growing foam floods out over the top of the volcano, and looks really cool.
No volcano? Just put vinegar into a sandwich bag…then add the baking soda to the bag. IF you can get the bag sealed fast enough the growing foam and fizz quickly fills the available space within the bag and pops the bag. You have to be quick though. As I was trying to get the bag closed, the mixture already began spewing out. But there’s enough of a reaction that some can spew and, if you get the bag closed after all, the bag will still pop!
59. Robot Hand

Ingredients: a. Cardboard b. Straws c. String
This was a long process for us.
Cut your 3-fingered plus thumb robot hand out of cardboard.
Leave some length of cardboard beyond the hand for your arm to fit onto.
Bend your “fingers” into 3 sections to mimic finger sections.
Add a cardboard “sleeve” to put your arm through and another to put your fingers through. Glue these sleeves to your cardboard arm/hand.
Then, cut small sections of straw and glue them to the finger sections.
Last, tie strings to the straw sections in the end of each finger and thumb.
Run the other end of each string through the straw sections per finger.
Make sure your string is long enough to reach the fingers sleeve and put a loop into each.
Now, you can put your arm through the arm sleeve and fingers into the finger sleeve, stick a finger into each string loop and pull. Each string independently operates the cardboard finger it is attached to. You can use your cardboard hand to lift relatively light objects.
60. Tornado in a Jar

Ingredients: a. Jar b. Water c. Dish Soap d. Food Coloring
Fill a jar up to about 1 or 2 inches from the top. Squeeze quite a bit of dish soap in to it. Add only 2 drops of food coloring so that the water doesn’t get too dark to see the tornado. Tighten the lid onto the jar and swirl. You’ll see a tornado funnel take form inside your jar! One of my favorite experiments.
61. Color Layering Experiment

Ingredients: a. Honey b. Corn Syrup c. Dish Soap d. Water e. Vegetable Oil f. Rubbing Alcohol g. Baster h. Food Coloring
Gently get each layer into a bottle so that you don’t risk mixing them all. Follow the order above (a-f) starting with honey. You can use a baster or just pour them into the bottle carefully. This is a density experiment, so each level should mostly keep separated from the level above and below it, since they’re different densities. You can also help make the separations pop by adding in food coloring so that you can really differentiate the layers.
62. Homemade Saline Slime (Not Edible)

Ingredients: a. Glue b. Water c. Baking Soda d. Food Coloring e. Saline Solution
We used one of the recipes for homemade saline slime found here, but, we struggled a bit. The recipe calls for ½ cup of glue + ½ cup of water, ½ tsp of baking soda, 1 Tbsp of saline solution, and some food coloring. Ok…following that exactly, we got green soup. So, in our 2nd batch (which was also soupy), we kept adding glue and baking soda until it thickened up. Slime ready.
But, the 1st still soupy batch? Why not have fun with it too? We decided to go full-on “Nickelodeon’s You Can’t Do That On Television” and had a slime fight. (Outside of course.)
63. Corn Starch and Water

Ingredients: a. Corn Starch b. Water c. Food Coloring (optional)
This is a cool project that will help teach your kids about solids and liquids…mostly because the resulting product defies definition as one or the other. Mix corn starch and water, in roughly equal parts. Stir it up. It will look like a liquid. However, if you push down quickly into it…it’s a solid! Punch it, and it will hurt! Pick it up, and it breaks from the rest of it…but very quickly melts in your hand and drips back into its bowl. One of the experiments the kids will talk about for weeks!
64. Static Motion

Ingredients: a. Balloon b. Empty Soda Can c. Kids’ Hair
This is perhaps the simplest experiment on this list. All you have to do is rub an inflated balloon on your kid’s hair to give it a reserve of static electricity. Next, lay an empty soda can on an uncarpeted floor and move the balloon close to the can. The static electricity will attract the can. The closer you get the balloon to the can, the more the can will move towards the balloon. If you steadily move the balloon away from the can (yet keeping it close enough for the static electricity to affect the can), the can basically chases the balloon!
65. CD Hovercraft

Ingredients: a. CD b. Soda Bottle Cap c. Glue d. Balloon
First, put a hole in the center of the bottle cap. Then glue the bottle cap over the center hole of the CD. Inflate the balloon and put it over the bottle cap. As the air leaves the balloon, it pushes through the hole in the cap and out the hole in the CD, lifting the CD off the surface slightly which allows it to hover and move around.
66. Fizz Inflation

Ingredients: a. Balloon b. Baking Soda c. Vinegar
This project takes the combination of vinegar and baking soda in a different direction than the volcano project. Put vinegar into the bottle, then dump baking soda in. Quickly cover the mouth of the bottle with your balloon, and the reaction of the baking soda and vinegar creates fizz that will inflate the balloon.
67. Skittles Color Wheel

Ingredients: a. Skittles b. Water c. Plate
One of the most colorful experiments in our list. The hardest part of this project will be setting up your Skittles! You have to put them around the inside of your plate, creating a full circle. It may take you a few attempts to get your full circle in place as shown below. Then GENTLY pour water in the center of the plate until the water encompasses your Skittle circle. Now, sit back and watch as the colors bleed off the Skittles towards the center of the plate. If you have different colors of Skittles placed around the circle, you’ll see a rainbow of colors in your color wheel. But, it’ll be watered down…so after the experiment, you won’t want to taste that rainbow…
68. Foam Fountain (aka Elephant Toothpaste)

Ingredients: a. Big bottle b. Hydrogen peroxide c. Packet of dry yeast d. Water e. Dish soap f. Food coloring g. Small cup
For this experiment…get ready to make a mess. It’s fun and the kids will love it, but it’s probably better to do it outside where the mess won’t matter. In your bottle, combine the dish soap (a big squeeze), food coloring (few drops), and hydrogen peroxide (1 cup). In the small cup, combine a pack of dry yeast with about three tablespoons of warm water. Carefully, pour your yeast mixture into the bottle with your first mixture. As the yeast begins to interact with the other ingredients, foam will grow and ooze out of your bottle and truly look like giant toothpaste.
69. Soda Geyser

Ingredients: a. Mentos b. Soda
Add this to the list of simple experiments, but exciting. Kids won’t be able to help loving the reaction when the Mentos hit the soda. Roll roughly 13 Mentos into a piece of paper, forming a tube. Cover the top of your soda bottle with a piece of paper and place your tube just over the mouth of the bottle. Quickly remove the covering piece of paper from the bottle, and the 13 Mentos will drop quickly from your paper roll into the soda. Almost immediately, you’ll have a soda explosion shooting straight up into the air. So, move while you can!
70. Homemade Lava Lamp

Ingredients: a. Big Bottle (1 liter) b. Water c. Vegetable oil d. Alka seltzer e. Food coloring
Fill a small bottle (roughly a 1 liter bottle) ¾ of the way full with vegetable oil. Fill the rest of it up to the beginning of the bottle neck with water. Drop in 10 or so drops of food coloring. Then break up a couple of Alka-Seltzers and drop them into the bottle. Cap it off and you’ll have a lava lamp that you can turn upside down and back again to watch your food color bubbles float through as “lava”.
71. Balloon Rocket

Ingredients: a. Kite String b. Straw c. Balloon d. Tape
This project helps teach wind power and momentum both. Tie a string to 2 items, stretching the string across a room. Make sure one end of the string has been sent through a drinking straw before tying it. Blow up a balloon…but don’t tie it. Tape your balloon to the straw and let go. The air exiting the balloon will shoot your balloon/straw combo down the line to the other end of the string!
72. Sound Amplification

Ingredients: a. Cell phone b. Paper Towel Roll c. 2 Red Cups
This experiment shows how sound amplification works. Cut a hole in the side of each of your red cups large enough to squeeze your paper towel roll into. Then, in the center of the paper towel roll, cut a hole just big enough for your phone to fit into. Next, play your favorite song. You’ll hear it blare out of your makeshift red cup speakers!
73. Smoke in a Water Bottle

Ingredients: a. Empty Water Bottle
All you need for this project is an empty water bottle that still has its lid. Take the bottle and twist it at its center, over and over. As the pressure mounts, keep twisting until you can’t twist the bottle anymore. Next release your twist, and when the bottle untwists, you’ll see “smoke” in the bottle and, if you open the lid, you can watch it float out.
74. Soda Can Implosion

Ingredients: a. Empty soda cans b. Ice Water c. Stove
This is a cool science project that shows how air pressure works. Boil some empty soda cans. Have a big bowl of ice filled water just beside your boiling cans. Using tongs, grab a heated can and put it into the ice bowl with the opening aimed down. You’ll immediately see the can self-crush!! Why?
The boiling water enters the can as evaporated vapor (gas). When you drop it into the cold water, the gas condenses and only makes a couple drops of water. BUT, that means the can has no inner air pressure. The outside air pressure pushes on the can, collapsing it! (Of course, make sure an adult handles the hot parts of this project!)
75. Invisible Ink

Ingredients: a. Lemon Juice b. Candle c. Paper
This is a very fun project for the kids to jump in on. Use anything you can get lemon juice onto the end of – to use as a writing utensil. We broke the ends off of a couple of colored pencils, stabbed those pencils into our lemon like dipping a pen into an inkwell. Our boys wrote the secret, invisible messages onto the paper, and we used a candle flame to hover under the paper heating it up. Pretty quickly, the message appears!
Be careful, though, as you “cook the paper,” you can accidentally burn part of your message…and the secret will be forever lost!
Naturally, my boys took this as an opportunity to write “Daddy is a poopy head” which they think is just hilarious.
IN THE KITCHEN
76. Alphabet Cookies

These taste great AND are educational. Alphabet cookies are really a good craft for preschoolers to help teach the alphabet. Also, who doesn’t appreciate a good chocolate chip cookie? Find your favorite cookie recipe (or buy a roll of dough at the store) and, with your children, form your cookies into the shapes of the letters of the alphabet. Bake and enjoy!
77. Popsicles

Take the beverage of your choice (aka your kid’s favorite) and pour it into Popsicle mold. These can be picked up at the dollar store for – well, a dollar. The next day, you’ll have Popsicles the kids will really enjoy! Try your favorite juice, fruit punch, or lemonade, and layer for a fun twist!
78. Dirt Cake

This is a fun spring activity that also tastes great! Kids love to help out in the kitchen, and this recipe is one they can really get in and get their hands “dirty”. Dirt cake is a good spring theme because it ties directly with planting new plants for spring growth and renewal. But, it’s really the presentation that sells it. Add gummy worms to have “worms” crawling around in your “dirt.” You can also put your servings in flower pots with fake flowers as decorations. Find the recipe for this scrumptious dessert right here!
79. Fruit Kebabs

Just what it sounds like. Pick your favorites fruits, cut ’em up and skewer them! Kids love them.
80. Chocolate Pizza

Chocolate Pizza tastes as good as it looks. While gummy bears don’t seem like they’d fit as a good topping, they really added a cool element as the mix of tastes intermingled perfectly.
I have to say this is one of the best tasting things we’ve made.
Ingredients
½ cup and 2 Tbsp shortening
1 ¾ cup semisweet chocolate chips½ cup granulated sugar
½ cup all-purpose flour
2 Tbsp water1 tsp baking powder
2 EggsY
our favorite candies for toppings
Directions
With your oven pre-heated to 375 degrees, melt and mix the chocolate chips and the shortening.
Mix the flour, the eggs, the baking powder, and the sugar together with your chocolate mix.
Grease a 12-inch pizza pan and spread your mixture on it evenly.
Bake for 15 minutes and cool.
Combine the ¾ cup of chocolate chips with the water and the 2 tablespoons of shortening and melt, stirring together. This will be your glaze.
Spread the glaze over the cooled pizza.Add your candy toppings.
81. An Apple “Smile”

Cut 2 slices of apple. Stick them together as “lips” with peanut butter. Next stick a row of marshmallows between your slices as the “teeth”. You end up with a fun activity and a fairly tasty snack!
82. Pigcakes

Pigcakes are a fun spin on morning pancakes. You can give him a bacon tail too, if you don’t think that’s too creepy.
LEARNING OTHER CULTURES
83. Japanese Fan

Draw your fan’s background picture.
Fold your paper from about an inch in (from top to bottom) and crease it.
Accordion fold the paper over and over till you get to the other side.
Hold your folds together at the bottom and fan out the top of the fan, allowing the picture to be seen.
Use clear tape to wrap the bottom inch or so of the fan, making that your handle.
84. Russian Nesting Dolls

Matryoshka Dolls are also known as Russian nesting dolls, the ones where there is a succession of smaller wooden “dolls” inside the bigger dolls. “Matryoshka” means “little matron”, so the nesting dolls usually start with a Russian lady painted on the outside doll. The smaller ones inside the first doll can be either gender with the smallest doll typically being a baby.
The dolls were first made as children’s toys in 1890 by wood carver Vasily Zvyozdochkin and painter Sergey Malyutin.
A craft version of the dolls is simple enough to make.
Start with cups.
Cut a dress and bonnet out of separate colorful paper. We used wrapping paper.
Then, using construction paper, cut out a round head and draw in a face.
Use a glue stick to affix the dress to the cup.
Add the bonnet on top of the dress.
Finally, add the face over top of the bonnet.
85. Tee Pee Village
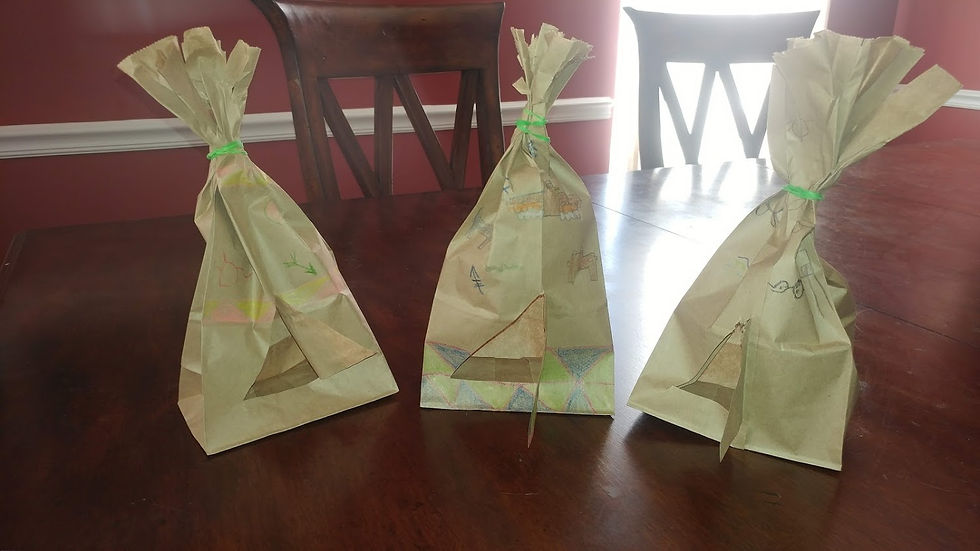
Draw Native American symbols, patterns, and imagery onto a paper bag. (A great time to talk about petroglyphs and totems with your kids!) Cut a “door” near the bottom of the bag, then rubber band the opening of the bag a few inches down from the top. Lastly, cut the part sticking up out of the rubber band to split it into the “separate pieces” of the teepee.
86. Mbira

A traditional African instrument, a thumb piano.
Get a small square piece of wood as the base.
Then, glue 2 Popsicle sticks side by side in the center of the square.
Next, straighten out 11 bobby pins.
Arrange them on top of the Popsicle sticks in the pattern shown below where the ones on either end are left shorter going out a little bit more at a time until you get to the center, with the center being the longest.
After that, lay down 2 more Popsicle sticks over top of the others, sandwiching the bobby pins between the 2 sets.
Nail the top layer of Popsicle sticks to the lower level, holding the bobby pins into place.
Finally, the short side of the bobby pins – bend them up to a 45-degree angle. You can cut the back end of the pins off.
Hold the square piece of wood with your fingers and play the pins with your thumbs.
87. Sistrum

A traditional Middle Eastern musical instrument.
Get a wire coat hanger and bend it similar to this picture. We put tape around the handle, for comfort and safety. Then you string two wires across the main part of the hanger, from one side to the other, and put beads, buttons, and whatever else you can think of to make noise. Decoration lets you personalize it even further.
88. Rain Sticks

A traditional Australian musical Instrument.
Take a paper towel roll, cap off 1 end with plastic wrap. Stuff the roll down the center with paper or aluminum foil, leaving some space on the sides of the stuffing. Pour in a handful of popcorn kernels and cap off the other end with more plastic wrap. Decorate the roll. You have a rain stick! Pour the kernels from end to end, as they flow through/over the stuffing, they’ll make a rain sound.
89. Bolang Gu (Pellet Drum)

· Tie a shoe string around a wooden spoon or paint brush, leaving the handle to be the handle for your drum.
· Find 2 old CD's.
(Take some time to explain to the kids what they used to be used for!)
· With a few inches of shoe string hanging off either side of your spoon/brush, glue the CDs to either side, covering the spoon or brush head.
Leave some time for the glue to sufficiently dry.
· Then string wooden beads onto your shoe string ends.
We used beads from a necklace, tying them on instead of running the lace through them.
· Paint whatever design you'd like on the CDs.
We chose to paint solid colors on ours and then have our boys write their names on each side in Chinese. (Google Translate is a big help here.)
Once your paint dries, start using the drum! Simply hold it by the handle and turn back and forth, letting the beads strike the front and back of the drum.
90. Origami

Origami is the Japanese art of folding paper into shapes. The word literally means paper folding. Usually, origami sculptures take the shape of animals. One of the most traditional animal shapes made is a crane.Granted, our cranes possibly look more like ugly ducklings than cranes.
Origami isn’t easy! At least, making cranes isn’t easy. Possibly, there’s some other shapes that are more starter level.Regardless the imperfectness of our cranes, the making of them was a lot of fun. For instructions on how to make them, check out wikihow.
Just remember, they don’t have to be perfect. Just have fun.
91. Russian Faberge Eggs

Faberge eggs are the quintessential Russian art form, symbols of beauty and wealth. If you’ve seen them in a movie, likely they were being stolen in a heist movie or being dropped and broken in a slapstick comedy. Why? They’re extremely expensive, that’s why!
If you’re starting with an egg that already has color, you only have to decorate it. Since our eggs were white, we painted them.
Once your egg is brightly colored, add decorations. Here, you can get as creative as you’d like. The real Faberge eggs are made from gold or other precious metals with jewels crusted all over them in elaborate patterns.
So, you can paint patterns on your egg, bejewel your egg with fake gemstones, add stickers, or whatever else you can think of. We had confetti made from foil wrapping paper. We doused our eggs in glue and rolled them in confetti to have the foil paper mimic the look of emeralds and rubies.
ACTIVITIES
92. Cincinnati Zoo Daily Animal Lessons

On Facebook, every day at 3PM EST, the Cincinnati Zoo will be doing live streaming animal encounters!

The Atlantic White Shark Conservatory is doing daily lessons on sharks on Facebook at 10am EST.
94. Lunch Doodles with Artist Mo Willems

The Kennedy Center is sponsoring a “Lunch Doodles with Mo Willems” program weekdays at 1PM. Mo is the writer and artist of famous kids books like Don’t Let the Pigeon Drive the Bus, Knuffle Bunny, and The Pig and The Elephant series. Kids are surely going to love this program where they get a doodle lesson from Mo himself!
95. Family Game Night
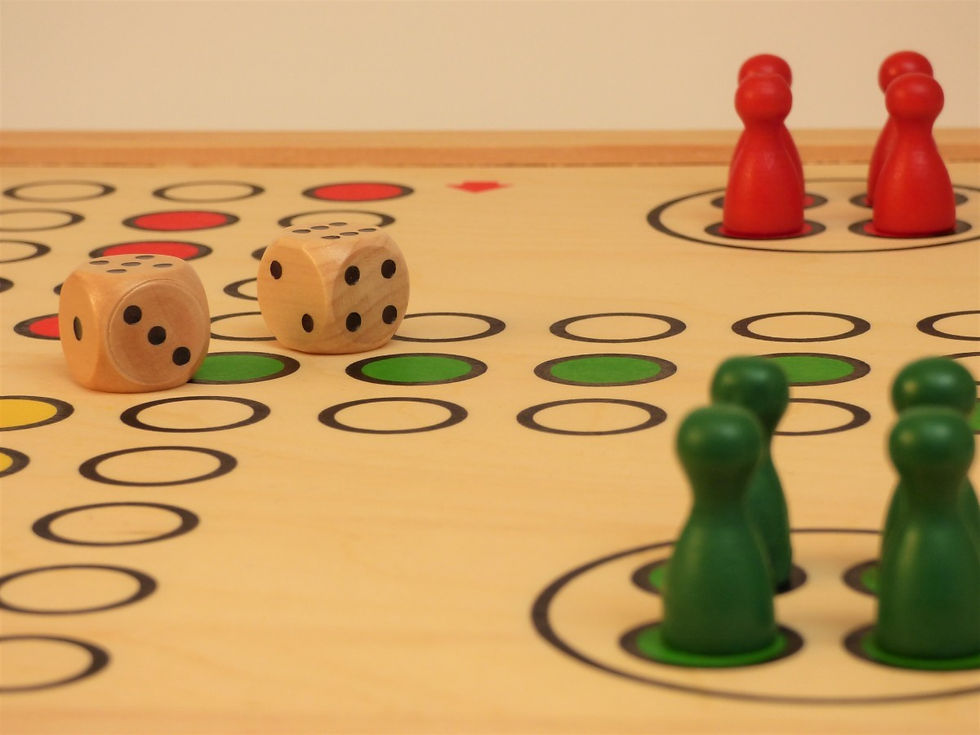
Establishing a game night is a great way to bring your family closer together. Board games also teach important social skills, such as communicating verbally, sharing, waiting, taking turns, and enjoying interaction with others. They can foster the ability to focus and lengthen your child’s attention span by encouraging the completion of an exciting, enjoyable game.
Even old-standards like Chutes and Ladders offer meta-messages and life skills: Your luck can change in an instant — for the better or for the worse. The message inherent in board games is: Never give up. Just when you feel despondent, you might hit the jackpot and ascend up high, if you stay in the game for just a few more moves.
96. Dress-up and Pretend
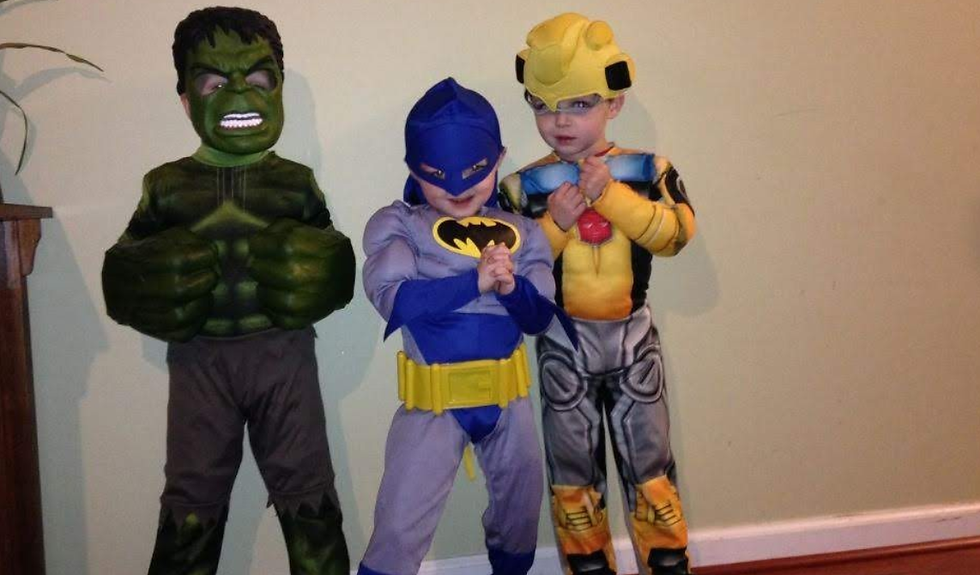
Children learn while pretending, especially at younger ages. Pretend play expands the imagination, teaches social, emotional, language, and thinking skills according to Scholastic.com. Dress-up, puppet shows, and just letting your kid’s imagination run wild all work with this type of learning.
97. Camping
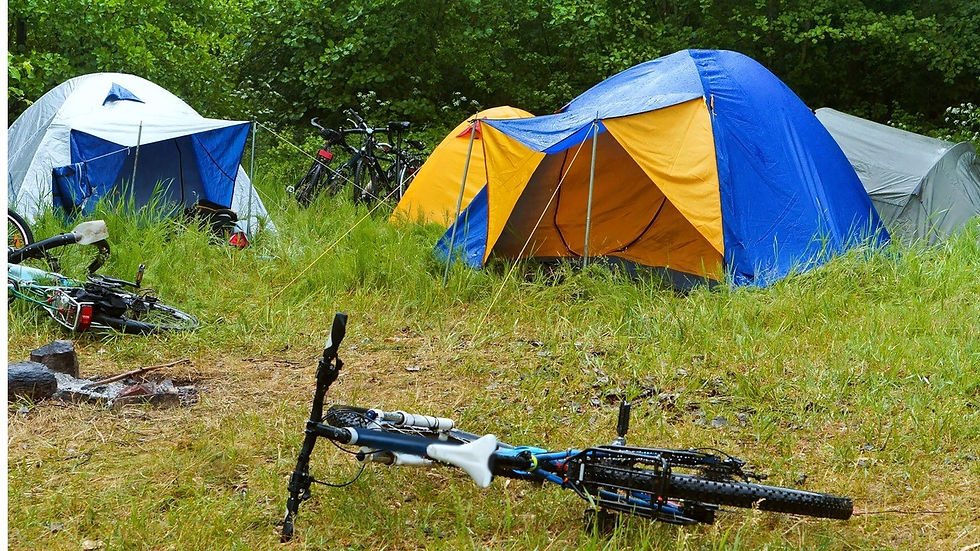
I’ve heard some like camping in the winter…but nope. Too cold. Summertime is the best time for this type of outdoor activity. Hot Dogs and S’mores around a campfire. Crickets singing their lullaby. Sleeping under the stars. If anything, you may get too hot…so…back to the swimming suggestion!
98. Fishing
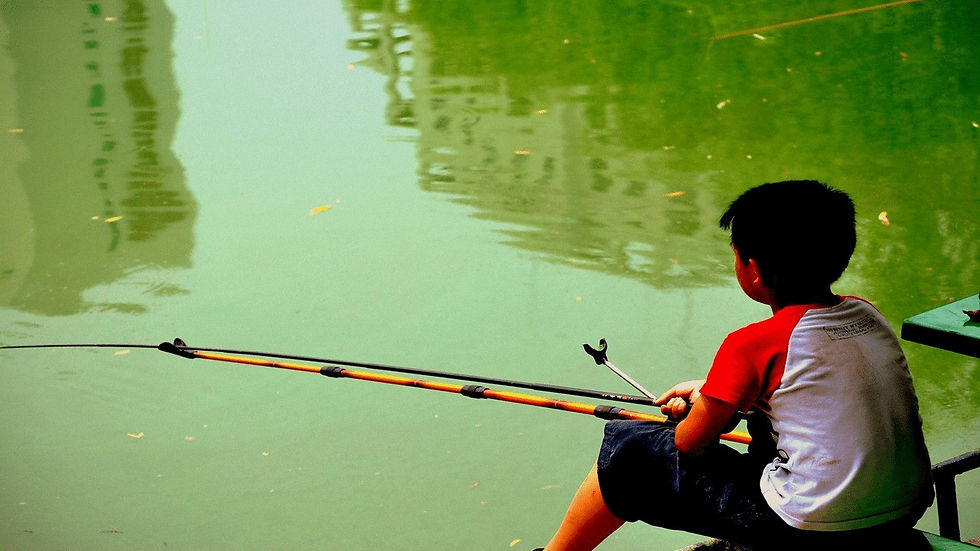
Fishing is a fun summer activity to get out and do alone or with your kids. Alone, it’s zen-like. With kids, fishing is a time-honored tradition. Just remember the opening credits of one of America’s favorite TV shows, The Andy Griffith Show. Andy and Opie making their way to their favorite fishing hole.
99. Planting Flowers or Becoming a Gardener

There’s nothing like really getting your hands dirty. Even kids know it. From burying their hands in a dinner of spaghetti, mashing their palms in wet cement, or sticking their hands in…um…other messy thing, children know that there’s no better sense of accomplishment. Embrace that with a little bit of garden time while teaching your kids how things grow. Spring is planting season after all. Let them really get their hands dirty by helping you plant some flowers. Maybe it’s an early Mother’s Day gift! Plus, once the plants grow and the flowers bloom, the kids will be excited to be able to say, “I did that”.

More on the planting theme! This time leave the flowers alone, and work on things like vegetables. Most kids have no idea the work that actually goes into growing the food on their plates. There’s nothing like seeing that first sprout poke its way through the dirt! Here is a handy list that shows germination rates. This will help guide you in determining what you plant based on how long it takes to sprout. Some kids may want that immediate gratification (by immediate we mean 5 – 6 days), while others may have the patience to wait longer (up to 30 days). Planting vegetables is also a great way to get kids to try new foods, as it’s something that they actually grew from scratch.
100. Take a Hike
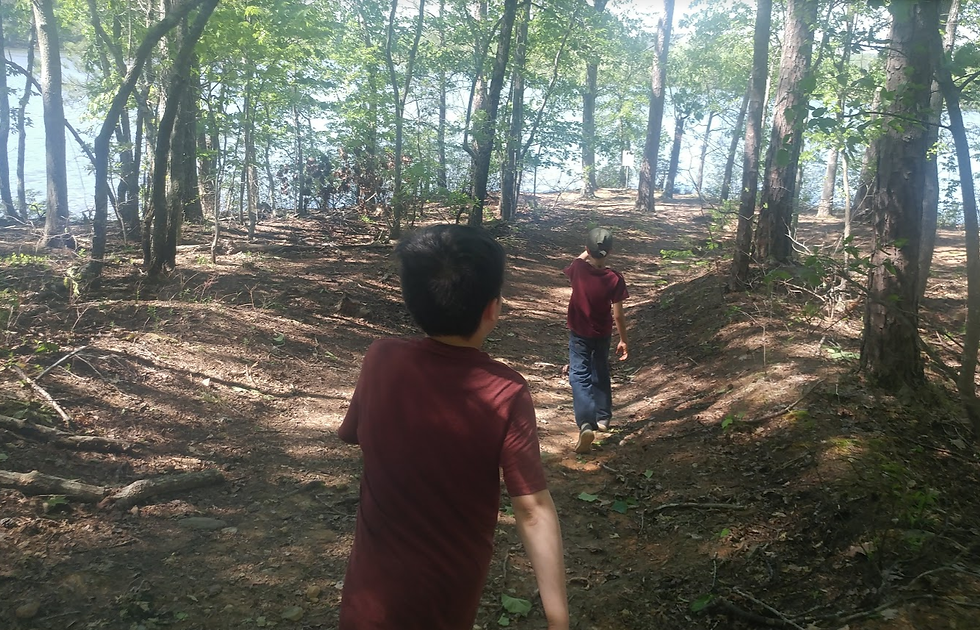
We’ve hiked in multiple state parks, Yellowstone, Shenandoah, Great Smokey Mountains. Regardless of the scenery, though, my kids just love getting out into nature and hiking (within reason on HOW far the hike is, mind you). They love listening for animals, looking for signs like tracks, and just experiencing nature! So, it doesn’t matter if you take a hike in a park or simply in woods near your own home.
There you go, plenty to get you through the days no matter what reason everyone’s at home. We hope you enjoy!
For more fun the rest of the year, be sure to check out our other craft ideas.


Comments